 |
|||
|
|
|||
|
Page Title:
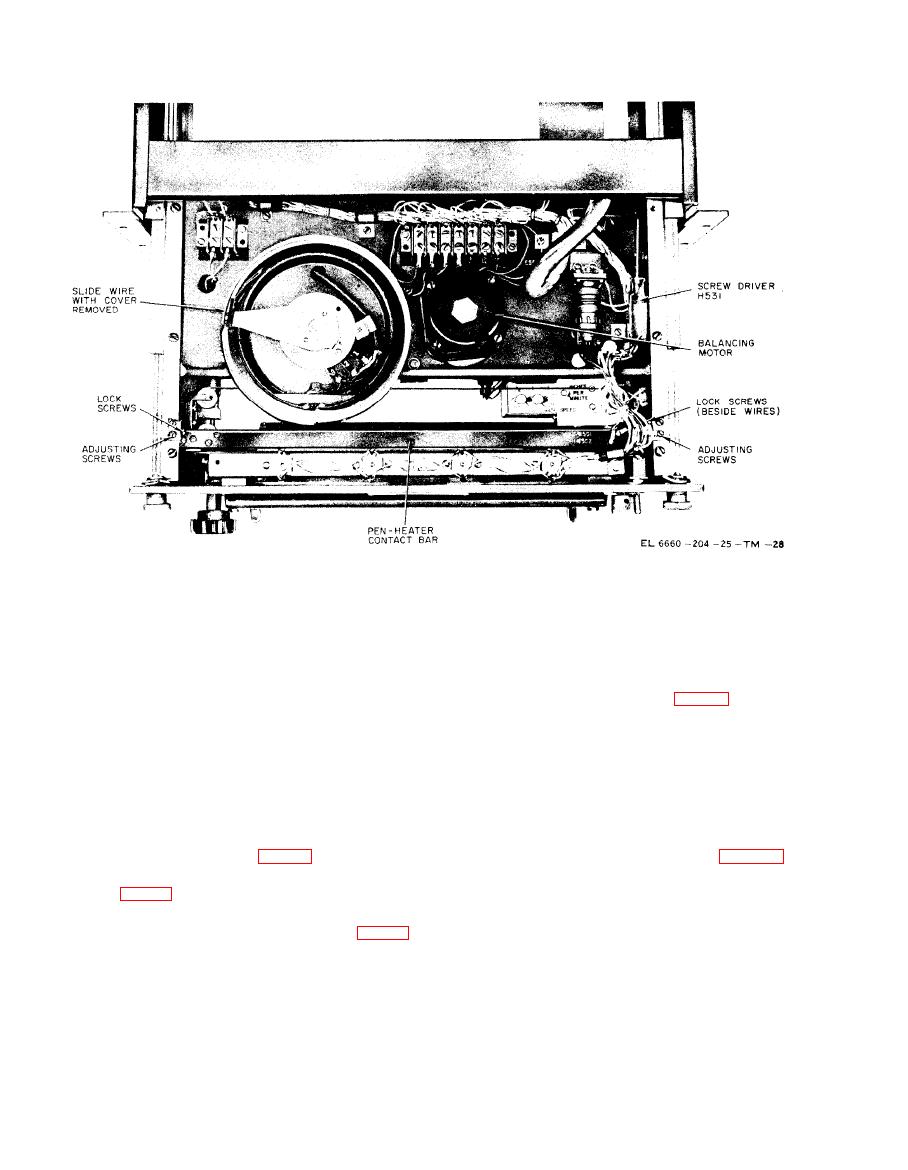
Figure 3-6. Recorder, top view. |
|
||
| ||||||||||
|
|  TM
11-6660-204-25
(5) Replace the pen cap on the ink barrel.
(4) Replace the rear panel, control panel, fan
panel, and desk. Tighten the mounting screws, re-
(6) Open the window of the frequency-time
connect the power, and check the recorder for
recorder by operating the window latches.
normal operation.
( 7 ) Loosen the setscrew (fig. 3-9) on the
front of the pen carriage.
3-10. Cleaning and Replacing Pen
(8) Grasp the ink barrel and gently lift it up
until it is free of the pen carriage. (The barrel is
Follow the procedure below to disassemble, clean,
reached from behind the panel.)
and reassemble the pen. Replace the nib (FSN
7510-537-7781) when necessary.
(9) Unscrew and remove the pen cap from
the ink barrel; discard any excess ink. Separate
a. Removing Pen From Pen Carriage.
the rubber washer from the pen cap.
(1) Open the frequency-time recorder drawer
and remove the screwdriver (fig. 4-7).
(1) Unscrew the penpoint assembly from the
(2) Remove the panel lamp assembly from its
mounting (fig. 4-7) by loosening the three mount-
ink barrel.
ing screws.
(2) Unscrew the sleeve-holding screw from
(3) Unscrew and remove the pen cap (fig.
the nib.
3-8) from the ink barrel. The rubber washer will
(3) Hold the nib upside down and gently tap
come off with the pen cap.
it until the sleeve assembly, with the attached
jewel, slides out of the nib.
(4) Carefully lift the pen heater from the
i n k barrel by rotating the pen heater gently
CAUTION
around the ink barrel. Lay the pen heater to one
When the sleeve assembly is removed,
side. Be careful not to break the lead wires to the
the ball should come out. Check the nib
pen heater.
|
|
Privacy Statement - Press Release - Copyright Information. - Contact Us |
