 |
|||
|
|
|||
|
Page Title:
Windscreen and O-Ring Removal and Replacement (CAPS Type II) (Fig. 3-23) |
|
||
| ||||||||||
|
|  TM 11-5830-263-20&P
3.9.5.
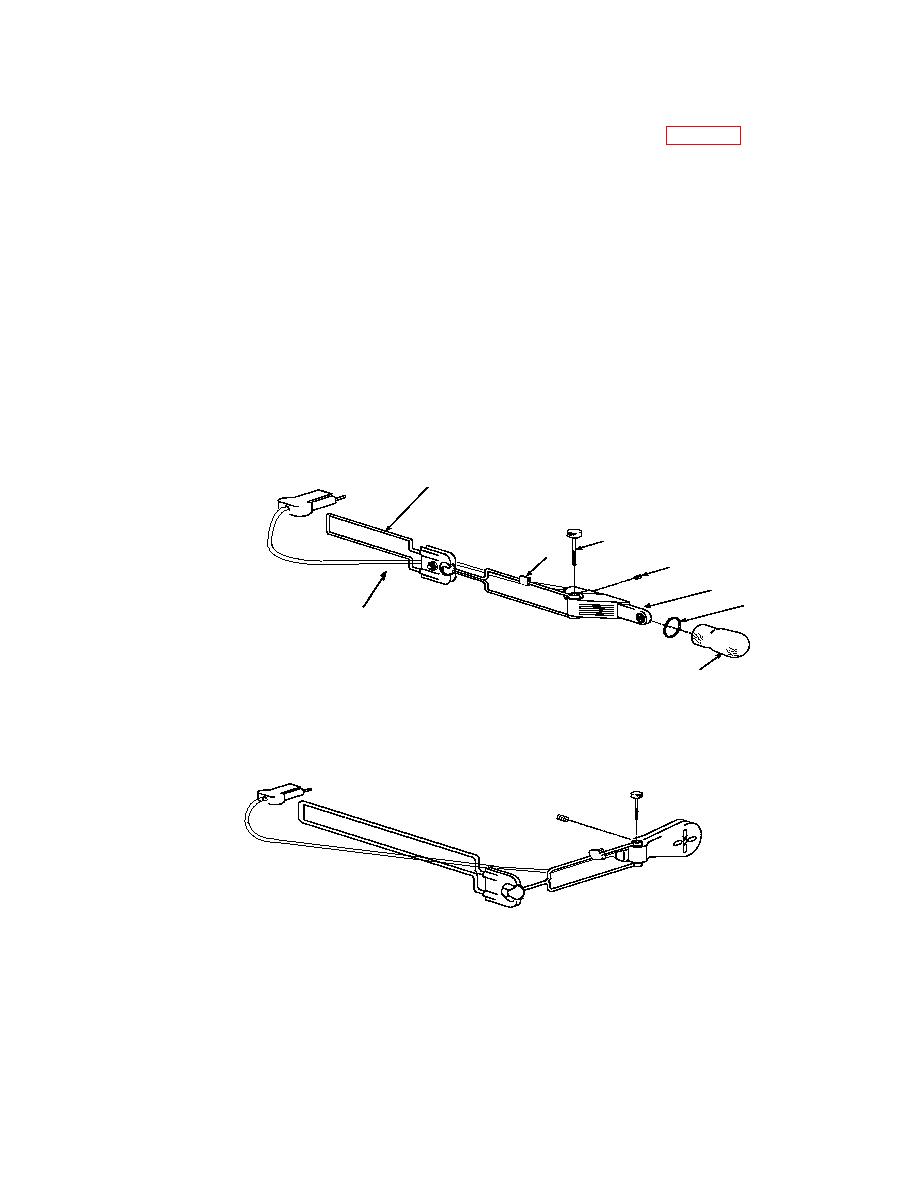
Windscreen and O-Ring Removal and Replacement (CAPS Type II) (Fig. 3-23)
a. Removal
1. Grasp O-ring (6) between thumb and forefinger and slide O-ring (6) and windscreen (7) off
microphone (5).
2. Separate O-ring (6) from windscreen (7).
CAUTION
WHEN PLACING WINDSCREEN/O-RING ON MICROPHONE BE CAREFUL NOT TO
TEAR WINDSCREEN.
b. Replacement
1. Compress closed end of windscreen (7) and place inside O-ring (6) until O-ring (6) is midway
on windscreen (7).
2. Slide O-ring (6)/windscreen (7) onto microphone (5) and adjust O-ring (6) until windscreen (7)
is secured.
1
3
2
4
5
6
8
7
|
|
Privacy Statement - Press Release - Copyright Information. - Contact Us |
