 |
|||
|
|
|||
|
Page Title:
Remove paint from vicinity of three mounting slots |
|
||
| ||||||||||
|
|  TB 9-2320-280-35-5
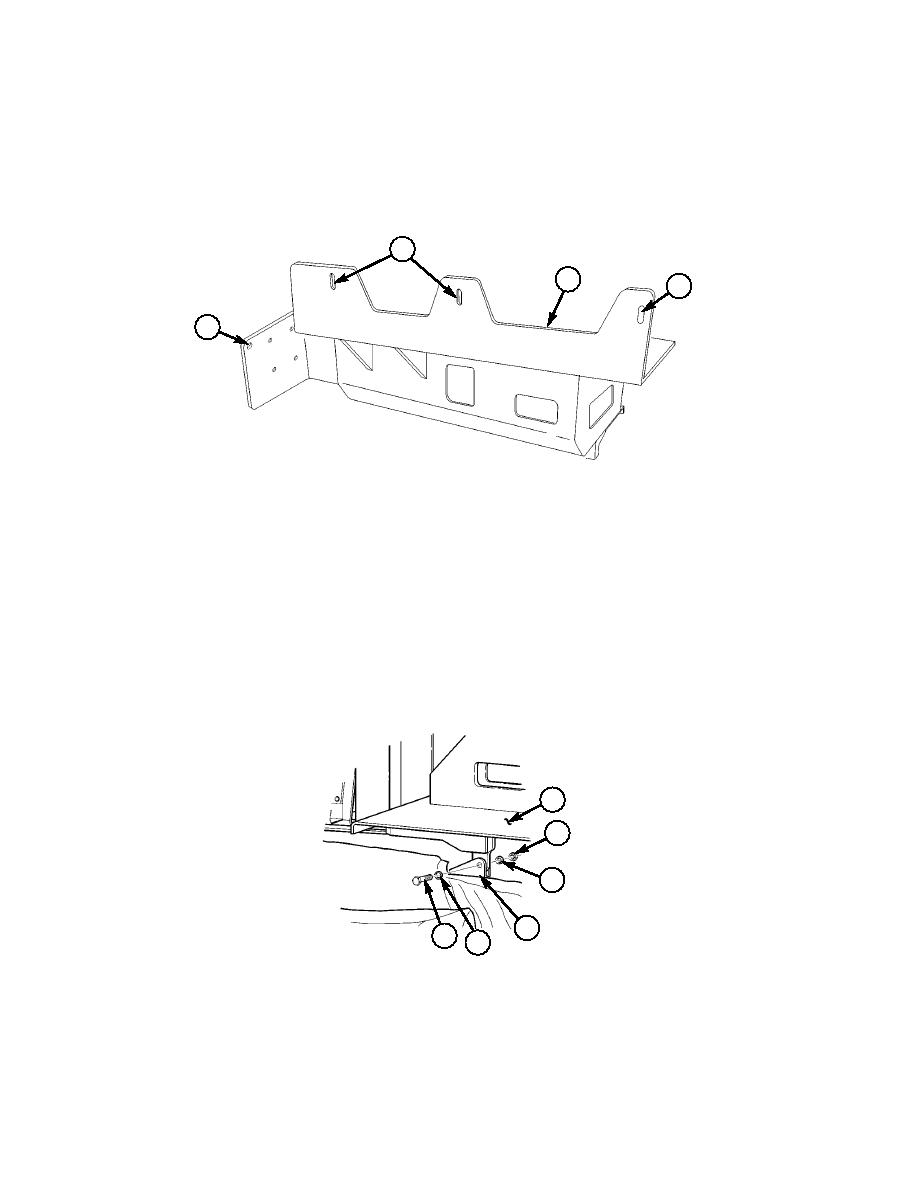
7-5. Remove paint from vicinity of three mounting slots (7) on integrated rack (1).
7-6. Remove paint from vicinity of hole (6) on integrated rack (1).
7-7. Apply antiseize compound to vicinity of three mounting slots (7) and hole (6) on integrated rack (1)
as required.
7
1
7
6
Figure 5-17.
NOTE
Do not install mounting hardware on top of integrated rack at this
time. Not installing this hardware leaves the integrated rack free
to pivot to assist in routing of cabling. Secure rack only after all
cabling has been routed.
7-8. Mount integrated rack (1) to existing radio rack mount (10) using screw (12), washer (11),
lockwasher (9), and nut (8). Repeat for opposite side. Do not tighten screws.
1
8
9
10
12
11
8.
NUT MS35649-2382 QTY. 2
9.
LOCKWASHER MS35338-46 QTY. 2
11.
WASHER 2436163 QTY. 2
12.
CAPSCREW B1821AH038C225N QTY. 2
Figure 5-18.
5-13
|
|
Privacy Statement - Press Release - Copyright Information. - Contact Us |
