 |
|||
|
|
|||
|
|
|||
| ||||||||||
|
|  TM 11-5820-670-30
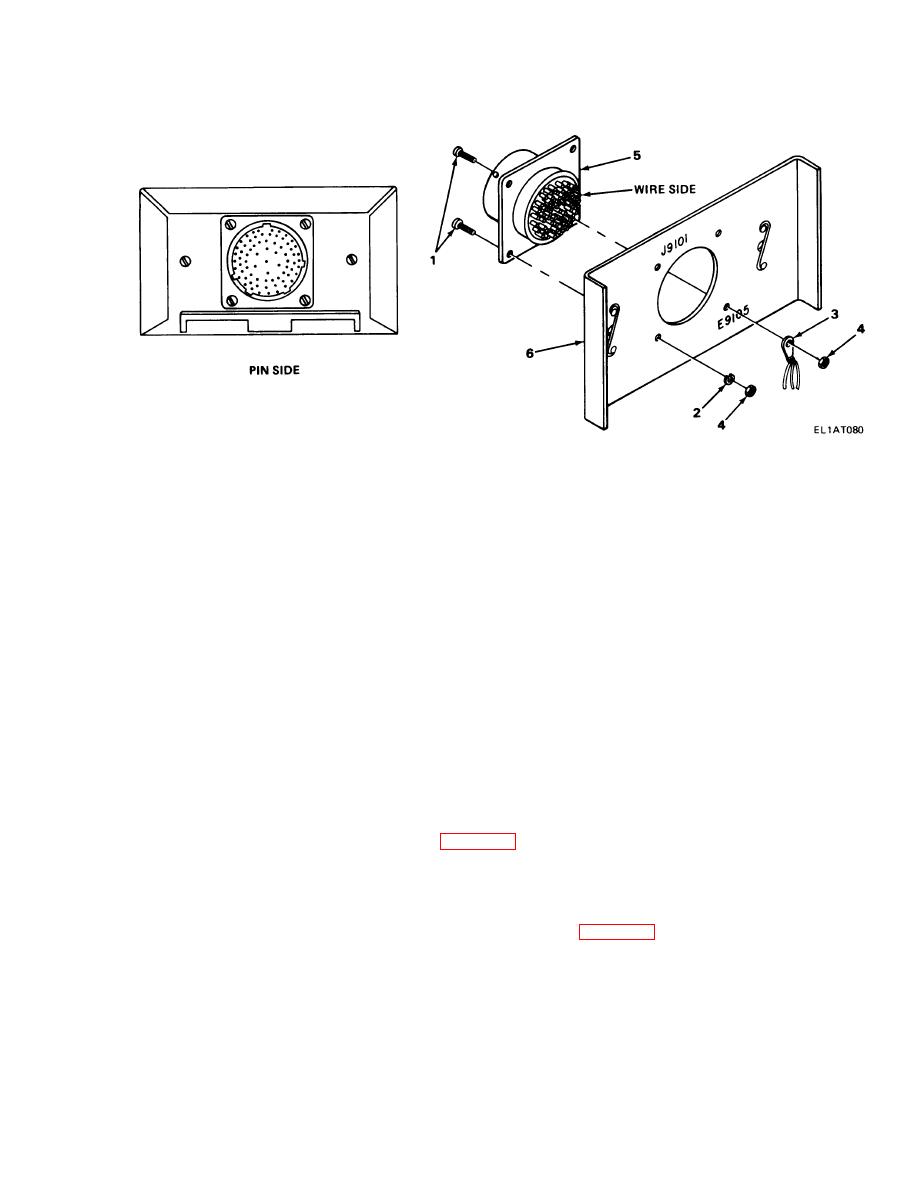
2-82. ELECTRICAL CONNECTOR J9101 REPLACEMENT. (CONT)
REMOVAL
NOTE
Tag all wires with connector pin letters. See table to verify wire color with connector pin
letter.
1. Unsolder wires from connector.
2. Using screwdriver and wrench, remove four screws (1), Iockwashers (2), ground lug (3), and
nuts (4).
3. Remove connector (5) from bracket (6).
INSTALLATION
1. Position connector (5) in bracket (6) as shown in detailed view.
2. install four screws (1), Iockwashers (2), ground lug (3), and nuts (4).
3. Using screwdriver and wrench, tighten screws (1) and nuts (4).
NOTE
When performing next step, start from center of connector and work out. Use table to
verify wire color to connector pin letter. See FO-21 for complete wiring diagram.
4. Solder wires to connector.
5. Remove tags.
FOLLOW-ON MAINTENANCE: Install switch and wiring assembly (para 2-77).
2-239
|
|
Privacy Statement - Press Release - Copyright Information. - Contact Us |
